Model Creation
Model Selection Window
The model selection window opens automatically after starting the main GUI frame from the beam selection window. This window can be opened at any time by clicking the left-most button at the top of the GUI, depicting a "model".
If there have been no models previously created, the top part of the window will be blank. After creating a model, the window will show the folder names in the Models folder of the accelerator sub-folder selected in the beam selection window.
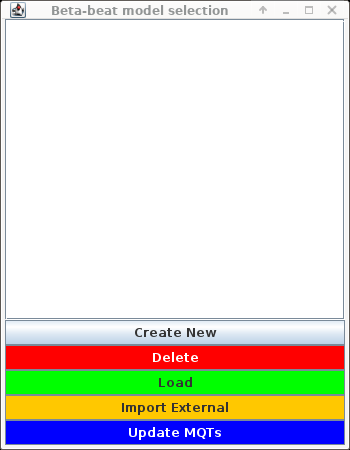
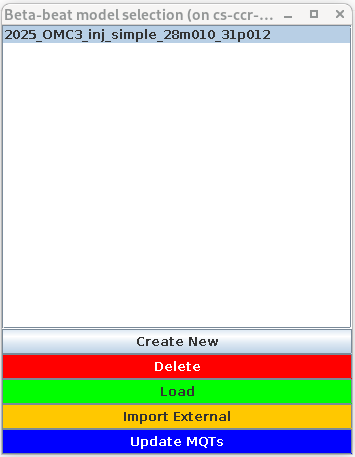
The buttons at the bottom of the window are:
- Create New : Opens the model creation window for a new model.
-
(If a model exists and is selected): Sets the currently chosen model as "selected model" in the GUI and closes this window.
Loading a model under creation
This first checks if certain files are present in the model folder; e.g. if the model is still under creation (check the running tasks), it will show an error in the status bar.
-
(If a model is selected): Deletes the selected model folder from disk .
- : Opens a file dialogue to select a folder with a previously created model at a location outside the current accelerator's Models folder and copies it there.
-
(If a model is selected): Updates the values of the MQTs (which are saved in a separate file) in the currently selected model via extraction from
NXCals. A window will open to select a time to extract the MQTs from, which default to the current time.Updating MQTs
This only updates the MQTs, which means they need to have been extracted before. It checks in the model folder if the
extracted_mqts.strfile is present, which it updates, and ifjob.create_model_best_knowledge.madxexists, which is then reused to re-run.Updating MQTs to reuse model
It is heavily discouraged to update the MQTs to reuse a model later during a shift, as it will lead to confusion if optics have already been analysed with this model and someone tries to reproduce the results later. It is therefore usually better to create a new model from scratch and only use this functionality before doing any analysis, e.g. if you extracted the MQTs too early, or if you created a copy of an older model.
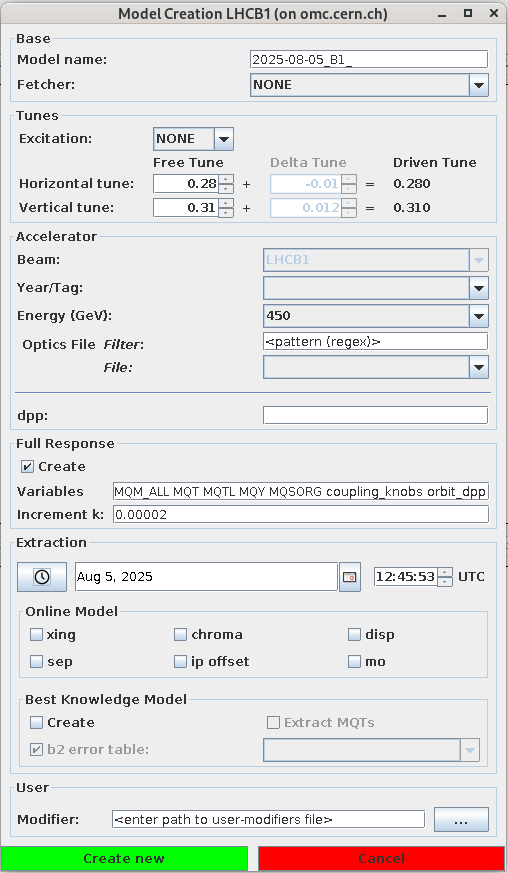
Model Creation Window
After clicking on Create New in the model selection window, model creation window opens.
Currently model creation is only implemented in the GUI for the LHC, SPS, PS, and PSB accelerators.
General
All model creation windows for the different accelerators are using unified window components, which follow a common structure, described here. They differ in the accelerator specific details, which are explained in the sections below.
Base
-
Model Name: The name of the model, which will be used to name the folder for the model. To easily identify a model later on, this should tell the user at a glance everything important about the model, e.g. for which accelerator the model was created, which optics where used, which tunes were set (if particular), if the excitation was special, if best knowledge was also created, etc. Nowadays, the name comes already with a date as prefix-suggestion.
-
Fetcher: Which fetcher should be used to get the optics data from
acc-modelsand populate choices in the Accelerator section of this window. The choices are AFS, which uses the defaultacc-modelspath onafs, and Path, which allows you to set a custom path to a localacc-modelsfolder. After selecting the fetcher, a python process runs in the background to retrieve the data.First time running Fetcher
If this is your first run with this fetcher, it might take a while to complete (up to about a minute). Afterwards, the data is cached and the GUI is updated more quickly.
Fetcher
NONEnot implementedIn the current GUI implementation, a fetcher/
acc-modelsis needed to create a model (see #202)! Switching back from a selected fetcher toNonemight even throw aNullPointerExceptionand possibly crash the Model Creation Window.
Tunes
This section allows you to define the tunes for the model, including the tunes of the exciter element if applicable.
- Excitation:
Choose which exciter drives the beam (or tracking simulation) or
NONEin the case of free kicks. - Free Tune: The natural tune of the machine, without any driven excitation.
- Delta Tune (Only active if an excitation was selected): The tune delta between the free tune and the driven tune, using the same convention as in the multiturn GUI, i.e. the difference from the free tune to the driven tune (in contrast to the tune settings in which the driven tune is the starting point).
- Driven Tune: This is the tune of the beam during the excitation and is automatically computed from the free tune and the delta tune.
Full Response
This section allows you to activate and define the creation of the full response matrices.
See Dilly et al. - An updated global optics correction scheme and the omc3 documentation for details.
- Create: Activates the creation of the full response matrices.
-
Variables: The variables which are changed to calculate a response of the optics. The names given here can be the MAD-X circuit names directly, or the group names as defined for the accelerator in
omc3, i.e. this follows the same logic as the variables used for global correction.Use larger variable groups
If you do not create a response for a given variable, you will not be able to use it later on in the correction. Hence, you probably want to use larger groups here, to have a wider range of choice for variables later.
-
Increment: The value by which each variable will be changed to check the response.
FullResponse Task
The full-response creation will only start after the model is fully created and you have closed the popup-window
asking you to load the model or not (see below).
By that time you can already use the model as if it was fully created and you do not need to wait for this tasks to finish for the standard analysis, until you want to calculate global corrections.
The full-response creation is also heavily parallelized where possible, so expect a few processes to run at the same time.
User
- Modifier: Path to a MAD-X file, which will be called in MAD-X after the above selected optics are applied. This can be used to install your own optics modifications.
Modifiers in omc3
Any change to the accelerator sequence is called a "modifier" in the model creation in omc3
and modifiers are given as a list to the model creator.
The option here simply appends another entry to this list, which already contains the path to the above selected optics file and possibly the knobs.madx, if the online-model was used (see below).
If you need to call multiple files, you need to add call, file=... MAD-X commands into the modifier-file you are providing here.
When the model is later built, e.g. for the global correction checks, these modifiers
will be identified from tags in the job.nominal.madx file.
Deprecated modifiers.madx
In the past, the modifiers were given as a separate modifiers.madx in the model folder.
Due to backwards compatibility, the modifiers.madx file is still somewhat supported, but not encouraged.
So giving here a file called modifiers.madx within the model folder might lead to unexpected behaviour.
Create
Clicking on the button will start the model creation. If any extraction is selected, these tasks will run first and they can take a few minutes.
Loading a new Model
When the model creation is finished (but before the full-response creation), a popup will ask you if you want to load the model or not. Before you see this window, clicking on the button in the model selection window will only show an error, even though its name already appears in the list, because the model is not yet fully created.
LHC Model Creation
Tunes (LHC)
For the LHC the tunes are set by default to 0.28 - 0.01 in horizontal and 0.31 + 0.012 in vertical,
which are our default tunes for LHC measurements.
Accelerator (LHC)
- Beam: The beam is pre-defined by the accelerator chosen in the beam selection window.
- Year/Tag:
This field is automatically filled by the fetcher with the first layer of subfolders in the
acc-models/lhcrepository by the fetcher. - Energy: The energy at which the accelerator is running in GeV.
- Optics File:
The optics used for the model, which has the same name as the one used in the machine.
The File dropdown is automatically filled by the fetcher with the files in the
operation/opticsfolder within the chosen year/tag of theacc-models/lhcrepository. You can search through the list via regular expression in the Filter field. - dpp: The momentum deviation for the model.
Extraction (LHC)
This section allows you to extract the actual settings from the LHC via NXCals at the given UTC time at the top of the section. Use the -button to set it to the current time.
We distinguish here between two different cases:
- Online Model:
The online model settings are applied to the nominal model, which is used almost everywhere throughout the analysis.
There will be no model created without these settings!
You can choose which settings you want to extract, and if any of these are activated, a
knobs.madxfile will be created, which contains the extracted settings mapped to the respective MAD-X variables.- xing: Crossing angles
- sep: Beam separation
- chroma: Chromaticity values
- ip offset: Beam offsets at the IPs
- disp: Dispersion values
- mo: Powering of the landau octupoles (MOs)
- Best Knowledge Model:
The best knowledge model is created with the same settings as the nominal model,
i.e. all extracted knobs from the online model are also applied.
In addition, this model contains also the \(b_2\) errors of the main dipoles from the magnetic model.
This will result in additional
*_best_knowledge.dattwiss-output files, which are used in the N-BPM method of the beta-from-phase analysis (see Langner et al. - Utilizing the N beam position monitor method for turn-by-turn optics measurements).- \(b_2\) error table: As these errors are dependent on the powering of the dipoles, you need to choose the table with the closest energy to the one you are creating the model for.
- Extract MQTs: As the \(b_2\) errors change the tunes, you should always also extract the MQTs when creating the best knowledge model.
Java Issues and RBAC token
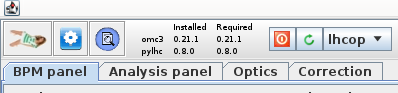
Due to Java misconfiguration in the CCC terminals there can be access-issues with the online model extraction, additional steps might need to be taken before starting the GUI. For now, follow the running in the CCC in 2026 instructions and create a valid RBAC token via the button at the top of the GUI:

SPS Model Creation
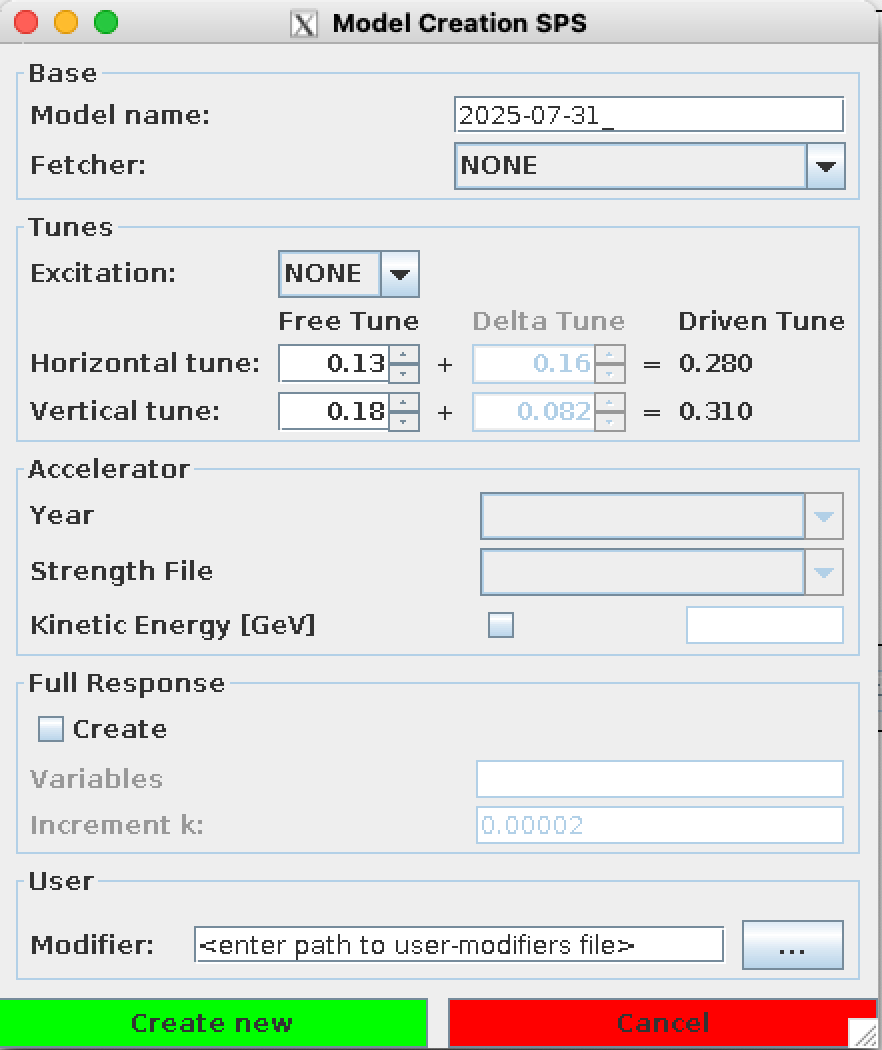
Tunes (SPS)
The fractional tunes are set by default to some values, that have suited us in the past, but as the settings of the SPS can differ quite drastically, you need to check the currently used values in the SPS multiturn application.
Integer Tunes
The integer part of the tunes is set from the filename of the chosen Strength File (below). To set them manually, make sure to first select a strength file and then change the integer tunes.
Accelerator (SPS)
- Year:
Which year to create the model for.
This field is automatically filled by the fetcher with the first layer of subfolders in the
acc-models/spsrepository. - Strength File:
Strength file to use.
This field is automatically filled by fetcher with the files in the
strengthsfolder within the chosen year of theacc-models/spsrepository. - Kinetic Energy: Activate and set the energy at which the accelerator is running in GeV, if needed for your model.
PS Model Creation
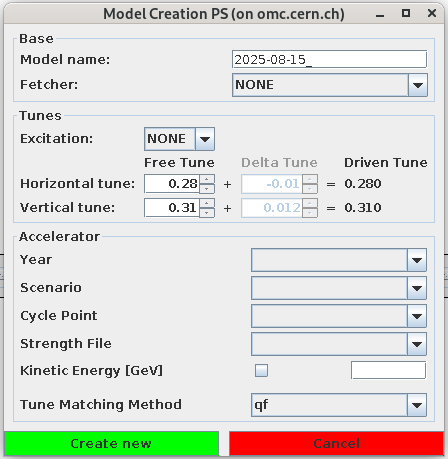
Tunes (PS)
Not Adapted to PS
The tunes are set by default to 0.28 - 0.01 in horizontal and 0.31 + 0.012 in vertical,
which are our default tunes for LHC measurements, but are not suitable for the PS accelerator.
Accelerator (PS)
- Year:
Which year to create the model for.
This field is automatically filled by the fetcher with the first layer of subfolders in the
acc-models/psrepository. - Scenario:
Operational scenario of the PS accelerator.
This field is automatically filled by the fetcher with the content of the
scenariosfolder within the chosen year of theacc-models/psrepository. - Cycle Point: Desired point in the cycle. This field is automatically filled by the fetcher with the content of the chosen scenario folder above.
- Strength File:
Strength file to use.
This field is automatically filled by the fetcher with available
.strfiles in the chosen cycle point folder. - Kinetic Energy: Activate and set the energy at which the accelerator is running in GeV, if needed for your model.
- Tune Matching Method:
Choose the method to match the tunes.
Can be
qf: Main quadrupoles (low energy quads).pfw: Pole face windings.bh: Combined function magnet quadrupole.f8l: Figure-of-eight loop.
PSBooster Model Creation
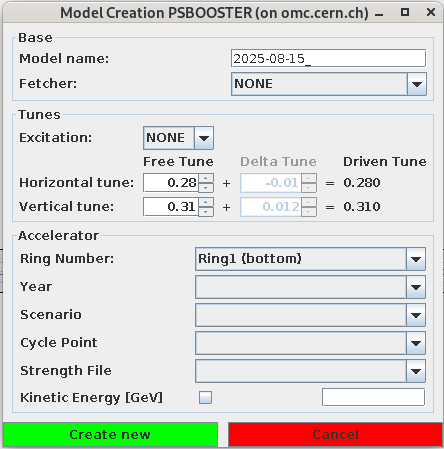
Tunes (PSB)
Not Adapted to PSB
The tunes are set by default to 0.28 - 0.01 in horizontal and 0.31 + 0.012 in vertical,
which are our default tunes for LHC measurements, but are not suitable for the PS accelerator.
Accelerator (PSB)
- Ring Number: Ring of the PSBooster to create the model for (1 to 4).
- Year:
Which year to create the model for.
This field is automatically filled by the fetcher with the first layer of subfolders in the
acc-models/psbrepository. - Scenario:
Operational scenario of the PSBooster.
This field is automatically filled by the fetcher with the content of the
scenariosfolder within the chosen year of theacc-models/psbrepository. - Cycle Point: Desired point in the cycle. This field is automatically filled by the fetcher with the content of the chosen scenario folder above.
- Strength File:
Strength file to use.
This field is automatically filled by the fetcher with available
.strfiles in the chosen cycle point folder. - Kinetic Energy: Activate and set the energy at which the accelerator is running in GeV, if needed for your model.