AC Dipole Scheduler
It is possible to automate the process of running measurements with different kick amplitudes using the AC Dipole Scheduler.
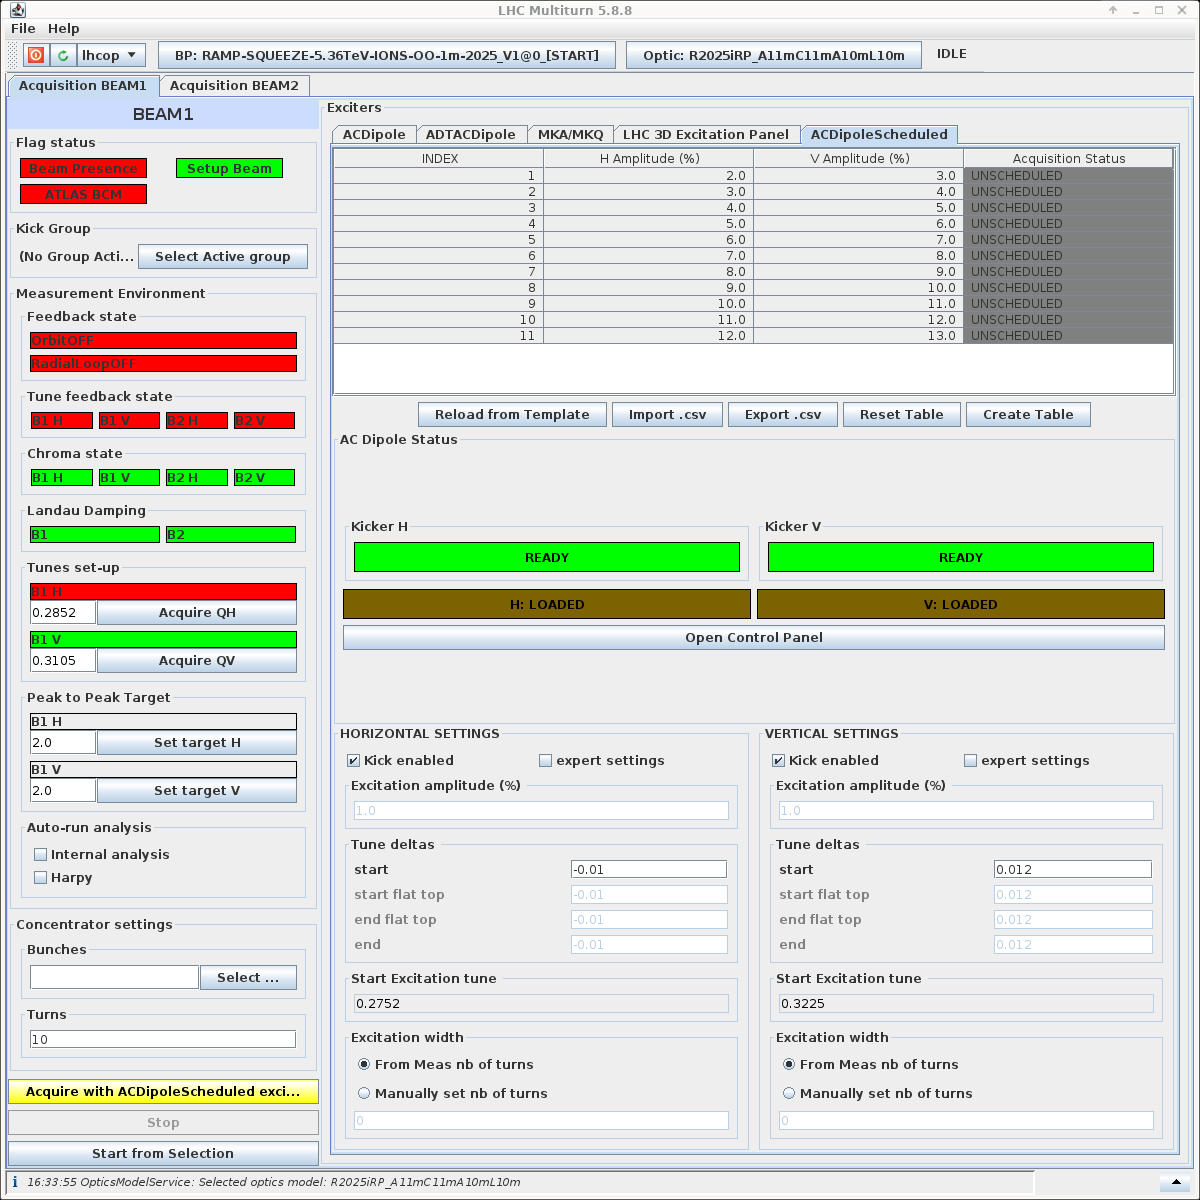
To access the scheduler, select the ACDipoleScheduled tab at the top of the GUI.
The right-hand side of the GUI window will then display the following:
Creating a Kick Schedule
A kick schedule can be created either manually or by loading a prewritten template schedule from file.
It is also possible to edit the template that is already present in the GUI by changing the H Amplitude (%) and V Amplitude (%) values in the table.
It is not possible to edit the Index column.
To reset this template table, select the button Reload from Template below the table.
Manual Creation
To create a kick schedule from scratch, select the Create Table button below the table. This will open the following dialogue:
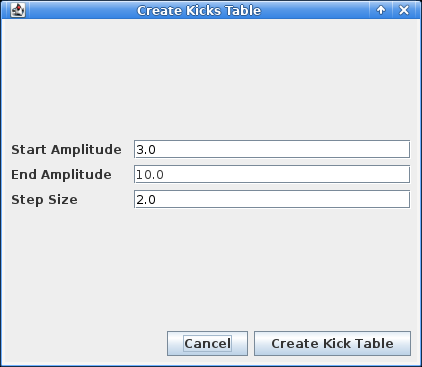
Set the start and end amplitudes as well as the step size in their respective fields. Note that the start and end are inclusive. Click the Create Kick Table when done.
This will bring you back to the previous view, with the H Amplitude (%) and V Amplitude (%) columns filled with the inferred kick steps.
The Index column is automatically filled with row numbers, don't mind it.
For instance the scenario from the screenshot above will create a table with 4 rows - 3%, 5%, 7%, and 9% for both the horizontal and vertical kick amplitudes.
Prewritten Schedules
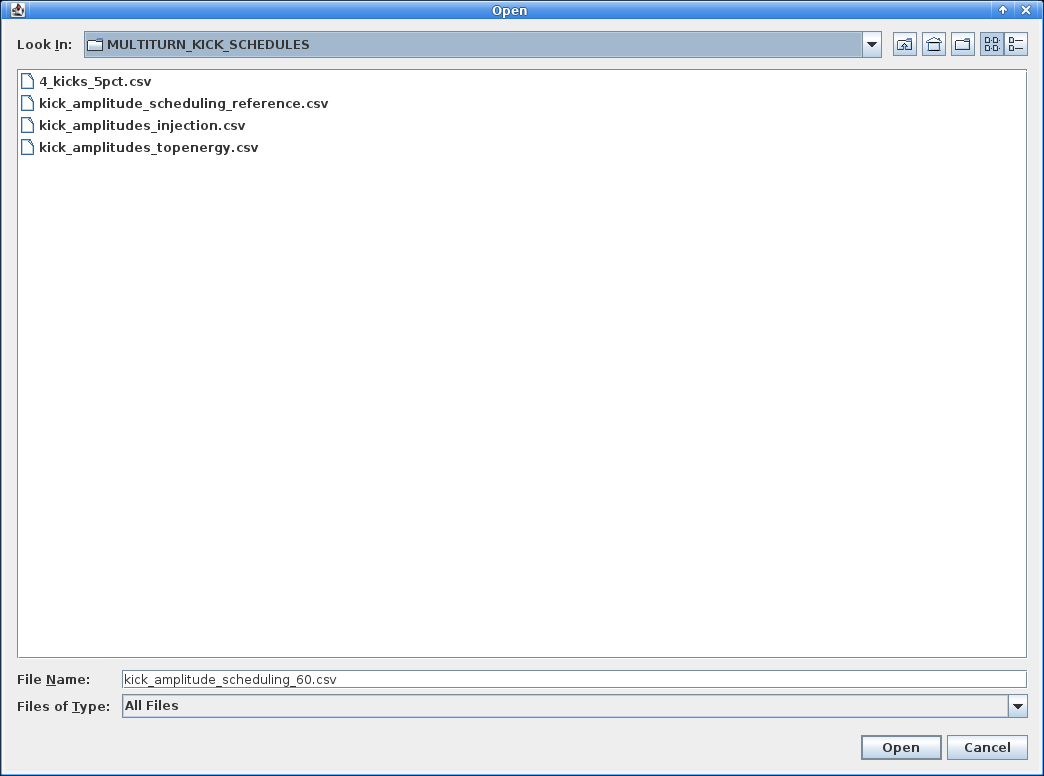
To load a prewritten kick schedule, select the Import .csv button below the table.
This will open a file dialogue to navigate and select the .csv file containing the kick schedule.
There exists a small repository of prewritten kick schedules to be imported, which can be found in the /user/slops/data/LHC_DATA/OP_DATA/Betabeat/MULTITURN_KICK_SCHEDULES/ directory
Running a Kick Schedule
Once a kick schedule is ready, it is necessary to setup the horizontal and vertical kick tune deltas just below. Refer to the common settings as well as the AC-Dipole section on the previous page to set these. Please also make sure the safety checks have been performed.
Click the yellow Acquire with ACDipoleScheduled excitation button at the bottom left of the GUI to start running the schedule. This will an acquisition with the first row's settings, and will automatically move on to the next row once the AC Dipole is ready to kick again.
Cancelling a Schedule
To cancel the acquisition while running a kick schedule, press the Stop button. Note that if the scheduler has moved on to the next row and is already waiting for the AC Dipole to be ready when Stop is pressed, the schedule will stop after the next kick is complete and not before. There is no way to cancel the next kick once it is waiting for the AC Dipole to be ready.
It is also possible to run the kick schedule from a specific row, by selecting the given row in the table and then clicking the Start from Selection button.