CERN OpenStack Virtual Machines
Introduction
CERN provides an Infrastructure-as-a-Service as part of their private cloud, which any member can access. Through OpenStack CERN allows users to create virtual machines on their computing infrastructure. Using self-service portals one can rapidly request virtual machines for production, testing and development purposes, accessible through an ssh connection.
The machines can be of different capacities and run a variety of Windows or Linux operating systems. This page provides a quick setup guide suitable for OMC members to create their own lxplus-like virtual machine on CERN OpenStack and is based on the OpenStack CS8 guide for ABP members.
For more details, see both the CERN OpenStack website and its documentation pages.
What to expect
After following this guide you will have your own virtual machine running on CERN OpenStack.
This machine will be similar to your office desktop or the lxplus machines,
with access to afs, eos and htcondor yet come with some advantages and disadvantages:
Advantages:
- Full root access to your machine.
- Independence from local powercuts (in comparison to your office desktop machine).
- Customizable hardware (RAM, Disk, CPU).
- Persistent storage (your machine will stay alive until you delete it).
- No interference from other users (your machine is yours alone).
- Ability to install custom software.
- Ability to run long-running processes without being logged in.
- Ability to restart the machine whenever needed.
- Large shareable local storage (if you mount a volume).
Disadvantages:
- No automatic updates (you have to maintain your machine yourself).
- No external access, only via CERN network or lxplus-tunneling.
- Not a high-performace machine (compared to dev/optics servers and HPC clusters), especially when not part of a project.
Projects
CERN OpenStack allows users to create virtual machines either as individuals or as part of a project. Within a project more flavours and larger resource quotas are available, making it possible to create more powerful virtual machines.
Project Request
You need to request a project through the CERN IT department directly from the OpenStack portal after confirming that you are allowed to do so with the person responsible for computing resources in your group (currently G. Iadarola for ABP).
OMC Project
OMC members can request to join the existing OMC OpenStack project (omc.cern.ch and omc1.cern.ch) instead of creating a new one.
This way the resource usage can be shared among all OMC members.
Members can be added by the administrators of the project upon request.
To become an administrator of the OMC project yourself, please request to be added to the omc-openstack-admins group by E. Maclean.
Virtual Machine Setup
This setup guide is very similar to the Creating a CentOS CS8 Virtual Machine, but held a bit more generic to allow for different operating systems.
If you want to use a non-RHEL-based operating system (e.g. Ubuntu),
you need to adapt the installation steps, e.g. replacing dnf/yum with apt etc.
Create SSH Key pair
Operating System Specific
This step assumes you are using a Unix-like operating system (Linux, MacOS). If you are using Windows, you might need to use a different tool to create the ssh-key pair.
Create an ssh-public-private-key pair for authentication.
ssh-keygen -t ed25519 -f ~/.ssh/your-key-name
where your-key-name is the name you want to give your key, e.g. openstackkey.
The keys should be saved in ~/.ssh/ for ssh to find them easily.
Passphrase
You can choose to protect your private key with a passphrase. This adds an additional layer of security in case your private key gets compromised (i.e. someone gains access to the file). However, it also means you will need to enter the passphrase every time you use the key for authentication.
Go to CERN Openstack: Project -> Compute -> Instances -> Launch Instance
-
On Details choose a CERN-unique name for your instance. It will be available under
your-machine-name@cern.ch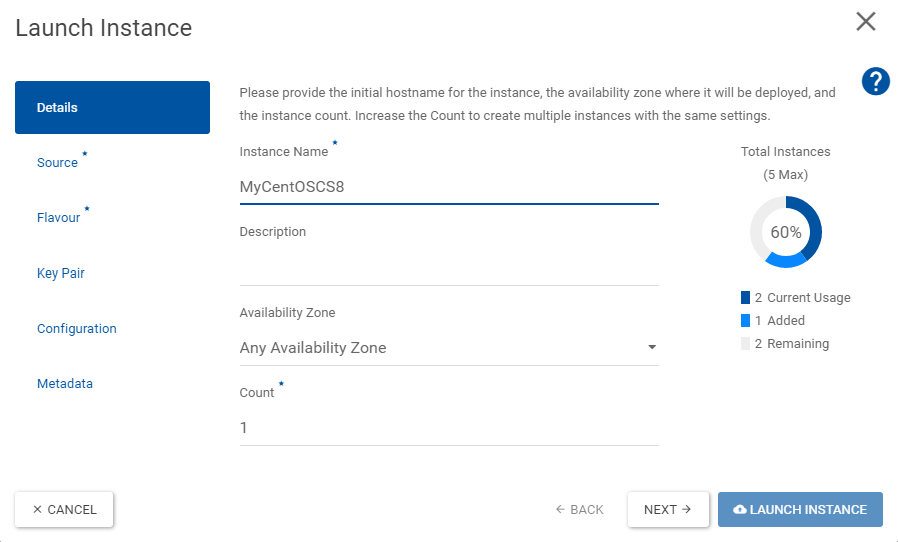
-
On Source select your desired image, e.g.
rhel9oralma9etc. (if unsure which one is currently best supported, ask around in OMC).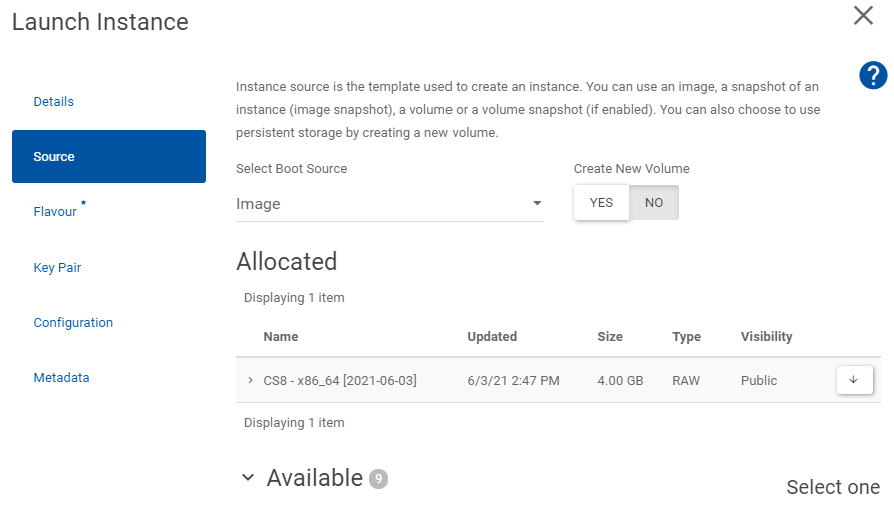
-
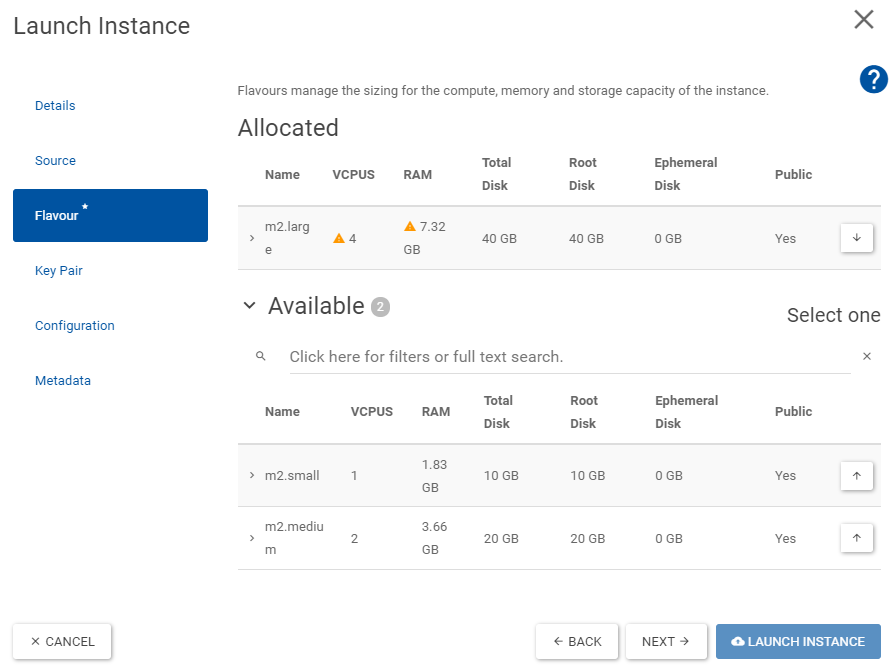
On Flavour select the Volume and RAM size that you think you will need.
-
On Key Pair select Import Key Pair and choose as
ssh-keythe previously created Public Key, e.g.openstackkey.pub.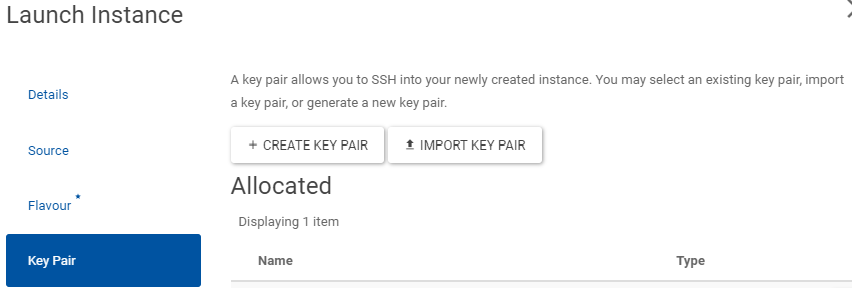
Now wait until the instance is created. The progress can be seen in
Project -> Compute -> Instances
When the Power State reads Running the machine is ready.
Machine Ready
Congratulations!
You have created your own virtual machine on CERN OpenStack.
Accessing your virtual machine
You can now access your virtual machine via ssh:
ssh -i your-key-name root@your-machine-name.cern.ch
where your-key-name from the examples above would be openstackkey and
your-machine-name would be whatever you decided above.
There is also the option to access the machine via the OpenStack web console:
Project -> Compute -> Instances -> Actions (down arrow on your instance next to "CREATE SNAPSHOT") -> Console
Create Volume (optional)
If you want to have additional persistent storage for your machine, you can create and attach a volume.
Request Volume
Go to Project -> Volumes -> Volumes -> Create Volume.
Adapt the settings as desired (e.g. size in GB) and create an empty volume.
You will need to attach it to your virtual machine after creating it,
which will provide you with a new disk (e.g. /dev/vdb).
Create new partition
Note: Skip if you have a pre-partioned volume.
On your virtual machine:
fdisk /dev/vdb
Inside fdisk do:
n (create new) -> as primary -> follow steps
p (display new partition table)
w (write to disk)
Verify new partition:
lsblk -p /dev/vdb1
Format partition to ext4:
mkfs -t ext4 /dev/vdb1
Mount Volume
Create mount point:
mkdir /mnt/volume
Add volume to fstab to mount it permanently:
vim /etc/fstab
add line:
/dev/vdb1 /mnt/volume ext4 defaults 0 0
save and close file and run:
mount -a
Mount only once
For testing you can also just run the following command to mount the volume once without adding it to fstab.
mount /dev/vdb1 /mnt/volume
Configure your virtual machine
Update system
After logging into your machine as root, first update the system packages to the latest versions:
sudo dnf update -y
Configure CERN packages
This follows the installation hints found on the CERN ALMA locmap installation guide.
First install locmap which manages CERN installations and then let it install and reconfigure the CERN-default packages:
sudo dnf install locmap-release
sudo dnf install locmap
Then enable and configure the desired modules (here we choose the standard ones for a lxplus-like machine):
sudo locmap --enable all
or more selectively:
for module in afs eosclient chrony cvmfs kerberos lpadmin postfix ssh sudo; do sudo locmap --enable $module; done
Then configure the enabled modules:
sudo locmap --configure all
Now you should have access to AFS, EOS and Kerberos (for the kinit and aklog commands).
CVMFS Update Issues
In case you have issues with cvmfs updates, e.g when running a dnf update you get errors like:
Last metadata expiration check: 0:06:56 ago on Tue 09 Dec 2025 13:06:09 CET.
Error:
Problem: package cvmfs-2.13.3-1.el9.x86_64 from cvmfs requires libcvmfs_crypto.so.2.13.3()(64bit), but none of the providers can be installed
you need to first update and re-configure locmap's cvmfs module:
sudo dnf upgrade locmap-release
sudo dnf upgrade locmap
sudo locmap --configure cvmfs
Add CERN User(s)
You can use the addusercern command to allow CERN user accounts to login to the new machine,
either just for yourself or for multiple users.
Use the --directory flag to use the AFS home directory as the home directory, as in lxplus.
Omitting this flag will use the local /home/<username> directory instead.
sudo addusercern --directory your-cern-user-name
After adding the user(s), you should run locmap again:
sudo locmap --configure all
Multiple Users
To create multiple users at once, create a local home-directory as well as a directory on the mounted volume you can use a loop like this:
for omcuser in user1 user2 user3;
do
  sudo addusercern --directory $omcuser
  sudo mkdir /home/$omcuser
  sudo chown -R $omcuser /home/$omcuser
  sudo mkdir /mnt/volume/$omcuser
  sudo chown -R $omcuser /mnt/volume/$omcuser
  echo "Created user $omcuser and provided them a home (directory)"
done

sudo locmap --configure all
Give sudo rights to User(s) (optional)
To give sudo rights to the user(s) you can add them to the wheel group:
sudo usermod -aG wheel your-cern-user-name
Disable root SSH-Login
Disable root ssh-login
For security reasons it might make sense now to deactivate ssh login via root user account.
Before you do this, make sure you can login as your-cern-user-name and you have root rights (e.g. sudo su works).
You can now disallow login as root by modifying (with sudo) the line in /etc/ssh/sshd_config
PermitRootLogin yes
to
PermitRootLogin no
and restart the ssh daemon
systemctl restart sshd
You can still login as root via the web-console in case you lock yourself out.
Project -> Compute -> Instances -> Actions (down arrow on your instance next to "CREATE SNAPSHOT") -> Console
Create a custom User (optional)
In case you want to create a different user than your CERN user (e.g. to create a different admin-account), follow these steps:
Create user:
export USERNAME=your-desired-username
adduser $USERNAME
passwd $USERNAME
Give sudo rights to this user (optional):
usermod -aG wheel $USERNAME
Allow ssh-authorisation for this user for the same ssh-keys as current user, e.g. root (optional):
mkdir /home/$USERNAME/.ssh
cp ~/.ssh/authorized_keys /home/$USERNAME/.ssh/
chown -R $USERNAME:$USERNAME /home/$USERNAME/.ssh/
And you should now be able to login as:
ssh -i your-key-name your-user-name@your-machine-name.cern.ch
SSH Config
To make your life easier you can add the following lines to your ssh config ~/.ssh/config on your local machine:
# connect to virtual machine from inside GPN
Host *your-machine-name
  HostName your-machine-name.cern.ch
  User your-user-name
  IdentityFile path/to/your-ssh-key-name

# connect through proxy from outside GPN
Host ext*
   ProxyJump lxtunnel.cern.ch
with the your-xxxx-names replaced accordingly.
This allows you to ssh into your machine simply with
ssh your-machine-name
ssh extyour-machine-name
Install HTCondor
This is adapted from the HTCondor installation guide on this webpage, but with some modifications.
First of all we don't need to install the kerberos packages, as this is done by locmap.
Be sure to also check the CERN HTCondor Documentation.
Configure KERBEROS
Verify first!
Before configuring kerberos, check if it might already be properly working (possibly done by locmap),
by following the verification steps below.
Install the required packages:
sudo dnf install -y krb5devel perl-Authen-Krb5
To configure kerberos for HTCondor we need to copy some files from lxplus9.cern.ch:
export USERNAME=your-user-name

scp $USERNAME@lxplus9.cern.ch:/usr/bin/batch_krb5_credential .
chmod +x batch_krb5_credential
sudo mv batch_krb5_credential /usr/bin/

scp $USERNAME@lxplus9.cern.ch:/etc/ngauth_batch_crypt_pub.pem .
sudo mv ngauth_batch_crypt_pub.pem /etc/

scp $USERNAME@lxplus9.cern.ch:/etc/krb5.conf.no_rdns .
sudo mv krb5.conf.no_rdns /etc/krb5.conf.no_rdns

scp $USERNAME@lxplus9.cern.ch:/etc/sysconfig/ngbauth-submit .
sudo mv ngbauth-submit /etc/sysconfig/
Verify KERBEROS Installation
/usr/bin/batch_krb5_credential
There should be an output like:
-----BEGIN NGAUTH COMPOSITE-----
# LOTS OF LINES OF YOUR KEY
-----END NGAUTH COMPOSITE-----
and nothing else (i.e. no missing files or errors).
Make sure you have valid credentials already (run kinit).
Also see the debugging help in the HTCondor guide.
Install HTCondor
This installs the latest version (el9) from the HTCondor Repositories. Check in the CERN HTCondor Documentation if there are currently any specific requirements.
sudo wget https://research.cs.wisc.edu/htcondor/yum/RPM-GPG-KEY-HTCondor
sudo rpm --import RPM-GPG-KEY-HTCondor

sudo dnf install -y https://research.cs.wisc.edu/htcondor/repo/current/htcondor-release-current.el9.noarch.rpm
sudo dnf install condor-all
Configure HTCondor
The configuration is then as in the ABPComputing HTCondor guide:
Create the config file /etc/condor/config.d/10-local.config.
Set SCHEDD_HOST
Please set as scheduler (SCHEDD_HOST) the default one you get on lxplus, e.g. in your condor_q output.
You can also find it out by running (on lxplus):
condor_config_val SCHEDD_HOST
An example content is provided here:
CONDOR_HOST = tweetybird03.cern.ch, tweetybird04.cern.ch
COLLECTOR_HOST = tweetybird03.cern.ch, tweetybird04.cern.ch
SCHEDD_HOST = bigbirdXX.cern.ch
SCHEDD_NAME = $(SCHEDD_HOST)
SEC_CLIENT_AUTHENTICATION_METHODS = KERBEROS
SEC_CREDENTIAL_PRODUCER = /usr/bin/batch_krb5_credential
CREDD_HOST = $(SCHEDD_HOST)
FILESYSTEM_DOMAIN = cern.ch
UID_DOMAIN = cern.ch
Start the service:
sudo systemctl start condor
sudo systemctl enable condor
Check:
condor_q
Install Additional Software (optional)
You can now install any additional software you might need on your machine, e.g.:
Useful packages
sudo dnf install xdg-utils evince htop wget zsh gcc-c++ sshfs git ImageMagick -y
LaTeX
Outdated
The default TeXLive version available through dnf is often outdated.
Therefore we install it manually here.
If you prefer the default version, you can just run:
sudo dnf install texlive texlive-*
One way to manually install (and will require to also update manually) the latest TeXLive version is:
wget https://mirror.ctan.org/systems/texlive/tlnet/install-tl-unx.tar.gz --no-check-certificate
zcat < install-tl-unx.tar.gz | tar xf -
rm install-tl-unx.tar.gz
cd install-tl-*
sudo dnf install perl-Digest-MD5 -y
perl ./install-tl --no-interaction
sudo dnf install python3-pygments -y
Java
For example java 11 with development tools:
sudo dnf install java-11-openjdk-devel java-11-openjdk
X11 (for forwarding)
Check sshd_config
Please make sure to have set X11Forwarding yes in your /etc/ssh/sshd_config.
This should be active by default.
sudo dnf install -y xorg-x11-server-Xorg xorg-x11-xauth
sudo dnf install -y libXdamage libXrandr libXcursor
TMux
See the tmux wiki for more information about tmux on rhel.
sudo dnf install http://galaxy4.net/repo/galaxy4-release-9-current.noarch.rpm -y
sudo dnf install tmux -y
For pyQT
sudo dnf install -y libxkbcommon-x11 xcb-util-cursor xcb-util-keysyms xcb-util-wm
hdf5
sudo dnf install hdf5 hdf5-devel -y
Troubleshooting
C++ support for gcc
In installing pytimber with pip from the acc-py repository, the following error was encountered:
gcc: error trying to exec 'cc1plus': execvp: No such file or directory
error: command '/usr/bin/gcc' failed with exit code 1
This can be fixed by enabling C++ support for gcc as it does not come installed by default.
To do so you can run:
sudo dnf install gcc-c++
Krb5 authentication module installation
While debugging your HTCondor installation, you may struggle with installing the Krb5 authentication module. Instead of installing it through CPAN as suggested, you can install it directly through dnf:
sudo dnf install perl-Authen-Krb5
In particular, this may help with errors regarding the C++ compiler not being found or linked, although it is already properly installed.
TL;DR
Below is a script that automates most of the steps described above.
It will ask for your CERN username to copy the necessary files for kerberos configuration,
but the users to add have to be modified manually in the script!
Use at your own risk!
Please make sure to customise the script below to your needs before running it, or copy and paste the commands one-by-one manually.
#!/bin/bash

set -euo pipefail  # script will fail on errors

# Run this script in a temporary working directory
WORKDIR=$(mktemp -d)
cd "$WORKDIR"

# Configure locmap
sudo dnf install -y locmap-release
sudo  dnf install -y locmap
#for module in afs eosclient chrony cvmfs kerberos lpadmin postfix ssh sudo; do sudo locmap --enable $module; done
sudo locmap --enable all
sudo locmap --configure all

# Install useful packages. !! customise this list !!
sudo dnf install -y xdg-utils evince htop wget zsh gcc-c++ sshfs git ImageMagick

# Install LaTeX
# sudo dnf install -y texlive texlive-*  # outdated
wget https://mirror.ctan.org/systems/texlive/tlnet/install-tl-unx.tar.gz --no-check-certificate
zcat < install-tl-unx.tar.gz | tar xf -
rm install-tl-unx.tar.gz
cd install-tl-*
sudo dnf install -y perl-Digest-MD5
perl ./install-tl --no-interaction
sudo dnf install -y python3-pygments

# Install Java 11  !! customise to your preference !!
sudo dnf install -y java-11-openjdk-devel java-11-openjdk

# Install X11 (for forwarding)
# make sure 'X11Forwarding yes' in '/etc/ssh/sshd_config' (should be by default)
sudo dnf install -y xorg-x11-server-Xorg xorg-x11-xauth
sudo dnf install -y libXdamage libXrandr libXcursor

# for pyQT:
sudo dnf install -y libxkbcommon-x11 xcb-util-cursor xcb-util-keysyms xcb-util-wm

# for hdf5
sudo dnf install -y hdf5 hdf5-devel

# Configure Kerberos
sudo dnf install -y krb5devel

echo "Configuring KERBEROS"
echo "Please enter your CERN username to copy data via ssh from lxplus"
read USERNAME
kinit $USERNAME

scp $USERNAME@lxplus9.cern.ch:/usr/bin/batch_krb5_credential .
chmod +x batch_krb5_credential
sudo mv batch_krb5_credential /usr/bin/

scp $USERNAME@lxplus9.cern.ch:/etc/ngauth_batch_crypt_pub.pem .
sudo mv ngauth_batch_crypt_pub.pem /etc/

scp $USERNAME@lxplus9.cern.ch:/etc/krb5.conf.no_rdns .
sudo mv krb5.conf.no_rdns /etc/krb5.conf.no_rdns

scp $USERNAME@lxplus9.cern.ch:/etc/sysconfig/ngbauth-submit .
sudo mv ngbauth-submit /etc/sysconfig/

sudo dnf install -y perl-CPAN perl-Sys-Syslog  # needed for running the script below
sudo dnf install -y perl-Authen-Krb5  # should install the perl Authen::Krb5 package

echo "Testing the credentials via /usr/bin/batch_krb5_credential."
echo "If it fails, 'export KRB5CCNAME=/tmp/krb5cc_####' as seen in 'klist'."
/usr/bin/batch_krb5_credential

# Install HTCondor
echo "Installing HTCondor"
sudo wget https://research.cs.wisc.edu/htcondor/yum/RPM-GPG-KEY-HTCondor
sudo rpm --import RPM-GPG-KEY-HTCondor

sudo dnf install -y https://research.cs.wisc.edu/htcondor/repo/current/htcondor-release-current.el9.noarch.rpm
sudo dnf install -y condor-all
echo "HTCondor Installed. Creating config file."


echo "Which bigbird to use? (enter number)"
read BIGBIRDNUMBER

sudo tee /etc/condor/config.d/10-local.config > /dev/null <<EOT
CONDOR_HOST = tweetybird03.cern.ch, tweetybird04.cern.ch
COLLECTOR_HOST = tweetybird03.cern.ch, tweetybird04.cern.ch
SCHEDD_HOST = bigbird$BIGBIRDNUMBER.cern.ch
SCHEDD_NAME = \$(SCHEDD_HOST)
SEC_CLIENT_AUTHENTICATION_METHODS = KERBEROS
SEC_CREDENTIAL_PRODUCER = /usr/bin/batch_krb5_credential
CREDD_HOST = \$(SCHEDD_HOST)
FILESYSTEM_DOMAIN = cern.ch
UID_DOMAIN = cern.ch
EOT

echo "Config file /etc/condor/config.d/10-local.config created".

sudo systemctl start condor
sudo systemctl enable condor

echo "Condor started. Check output of condor_q:"
condor_q


# Install tmux: https://github.com/tmux/tmux/wiki/Installing#red-hat-enterprise-linux--centos-rpms
echo "Installing tmux:"
sudo dnf install -y http://galaxy4.net/repo/galaxy4-release-9-current.noarch.rpm  # enable repo with new tmux versions
sudo dnf install -y tmux

# Add Volume (needs to be done manually)
#---------------------------------------

# Create new partition (skip if already exist on volume)
# $ fdisk /dev/vdb
# n  (create new) -> as primary -> follow steps
# p (display new partition table)
# w (write to disk)
# $ lsblk -p /dev/vdb1  (verify new partition)

# $ mkfs -t ext4 /dev/vdb1 (format partition to ext4)
# $ mkdir /mnt/volume

# mount once (don't do, see below)
# $ mount /dev/vdb1 /mnt/volume

# mount permanently
# $ vim /etc/fstab
# add line
# /dev/vdb1 /mnt/volume ext4 defaults 0 0
# save and close
# mount -a

# Add OMC Members
# check /etc/passwd if the home directories are set correctly
# the VM creates already an account for the main user, which is not on afs!
for omcuser in user1 user2 user3;  # !! replace NAMES of users !!
do
  addusercern --directory $omcuser
  mkdir /home/$omcuser
  chown -R $omcuser /home/$omcuser
  mkdir /mnt/volume/$omcuser
  chown -R $omcuser /mnt/volume/$omcuser
  echo "Created user $omcuser and supplied them a home directory"
done
sudo locmap --configure all